Thursday, February 27, 2014

Details in the knitting

I realize that I've been posting more writing than photographs lately so I wanted to share some shots of the work coming off my needles these days. What a change from when I first started this blog and was too scared to write anything because I felt like I sounded stupid! Oh, the invisible audience that terrorizes us all.

Above is my latest text knitting venture, where I'm riffing off of the ideas I started with "Full-On Meltdown". So far, I've only had one significant mistake that ultimately turned into a happy accident. I changed the direction of the striping every 10 rows, and the text had been designed to fit into 12 rows......SHIT! So, I had to delete the 2 spacer rows I initially had between the letters and, once I saw the results, I came to the conclusion that it made the design more effective than I had originally intended! PHEW!

May all our mistakes turn into happy accidents!

 This is a knitted hot water bottle cover I made as a gift for my boyfriend's birthday. Nowadays, when I'm faced with any knitting project (especially those that are not my design), I have to find a way to make it that much more interesting, or at least involve some new technique so I can learn and grow. I customized this simple cover with a hexagon pattern and chain-stitched lettering. 

My boyfriend was diagnosed with rheumatoid arthritis last year and this was my way to aid in a difficult situation that I have virtually no control over.

And I HATE not being in control!

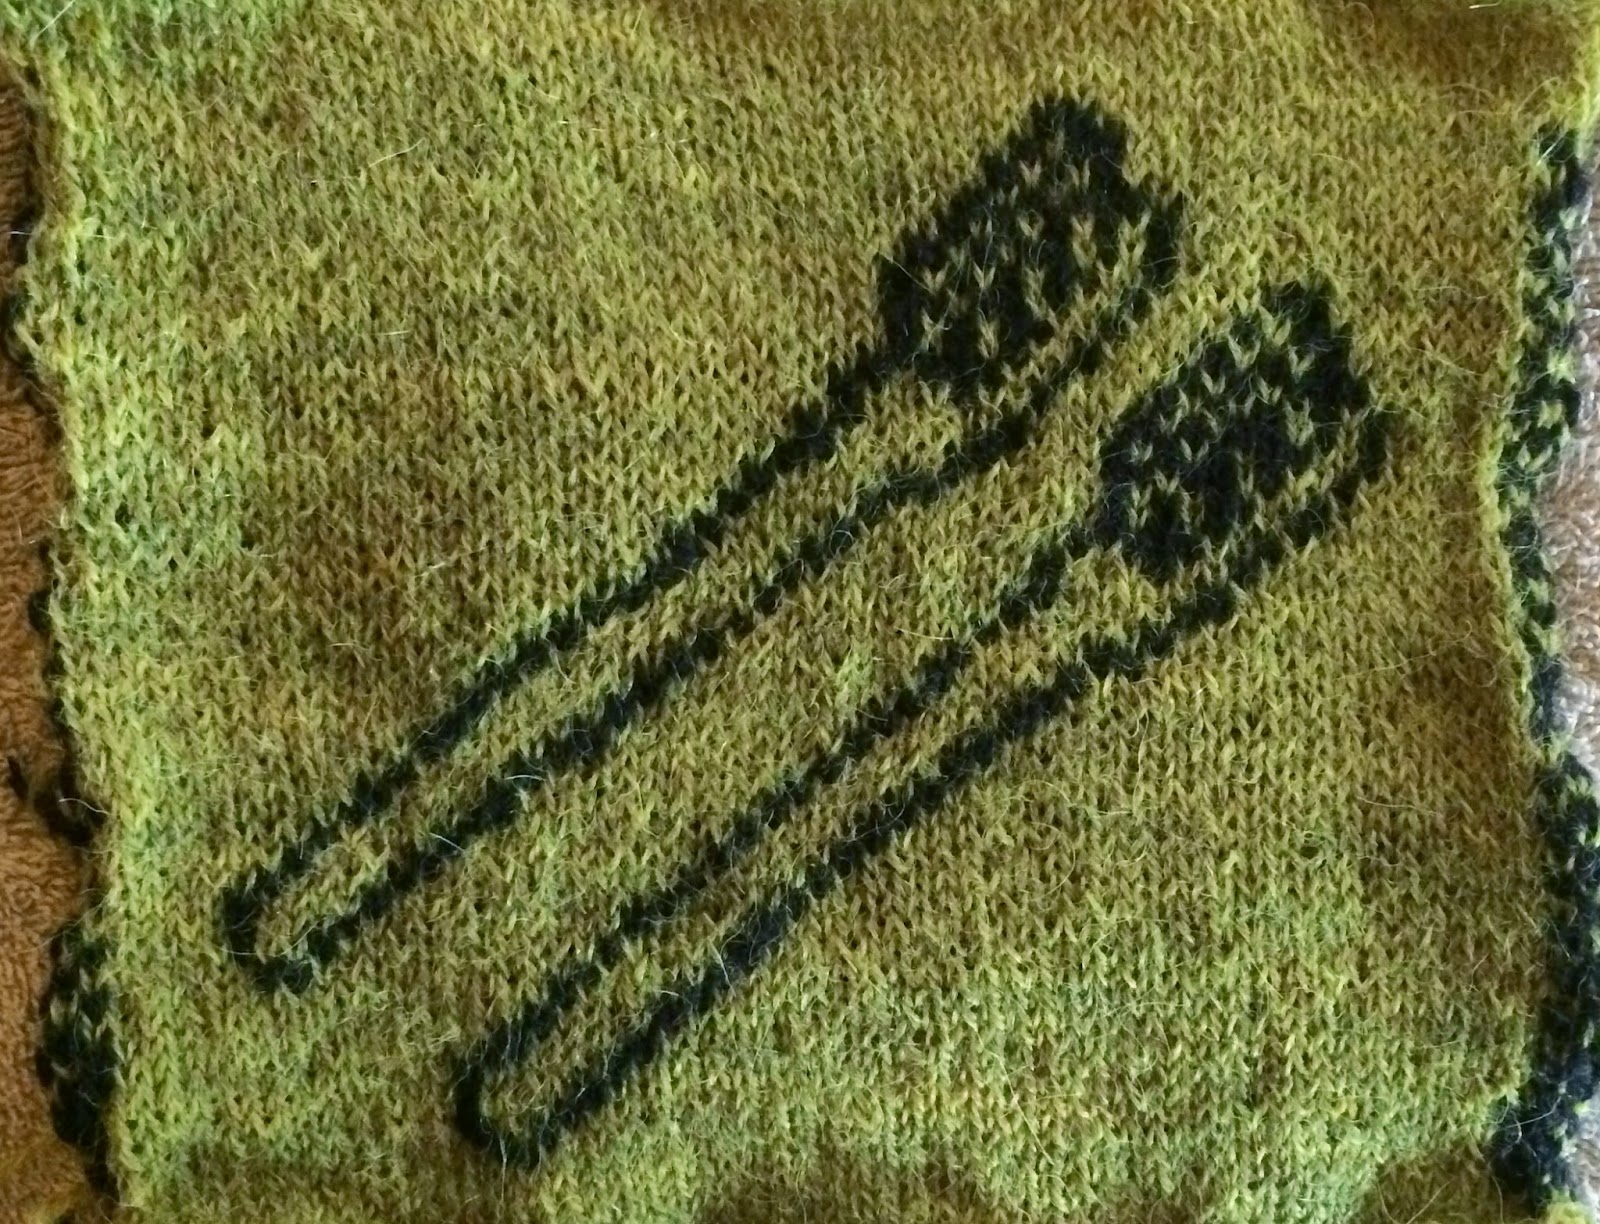
 I couldn't stop thinking about these 2 toothbrushes that I had designed originally for this piece. And after buying a great miniature antique painting a few month back, I've been thinking about small art. I'd love to do more with this simple format. I think we'll be getting around to building frames sometime next month so only then will I really get an idea for how this will turn out. Looking forward to that.

This idea came directly out of a personal experience I had when I first started dating my main man. We had been seeing each other for a few weeks and I had already taken to spending the night over at his house. In an effort to 'be cool' and not be like 'other girls', I decided to leave my toothbrush in his medicine cabinet, but hide it on the top shelf where I thought it wouldn't be seen. Adam is like the coolest guy. Seriously. I've never seen him do anything uncool. We hadn't officially labeled our relationship so I was working extra hard to be cool. By the next time I came over, he had found my brush and placed it next to his brush by the sink.

It was such a small gesture but it really said something to me about us.

So now I look at 2 toothbrushes side-by-side as a real, everyday reminder of the deep intimacy I share with my wonderful man.

This is a secret that I must not reveal for fear of those who might been looking! 

Stay tuned for more on this project...

Until then, I'll be in my studio.

Have a great day!!

Tuesday, February 25, 2014

How To Write a VISION & MISSION STATEMENT

I attended the Southern Entrepreneurship in the Arts conference this past weekend in Greensboro and it totally surpassed my expectations. I had a great time! It was hosted by UNCG and ran the gamut on topics pertaining to every kind of person pursuing an art career. That meant they had speakers on issues as broad as "Making A Career As An Artist" to entertainment lawyers providing insight into copyright laws to clinical psychologists leading discussions on creative blocks and procrastination. It was truly a unique and valuable opportunity for me to be in a place where I could relate to everything and everyone around me.

There were 3 keynote speakers and then tons of breakout sessions where we could choose which speaker and what topic we want to attend. My favorite part of the day was with a woman named Ellen Lloyd who hosted an interactive session on crafting your vision and mission statement for your art career. This is something that I've always heard is important to create - like a business plan for yourself - yet it always felt so abstract that I was burdened at the very thought of trying. So, I had to go sit in and hear what she was going to say. I was so blown away with how successfully she was able to debunk the mysteries out of my own head that I went home and tried the lesson over again with my fellow artist and longtime friend Megan ("Bring post-its!") We had so much fun and I learned so much more doing it again that I decided to share the lesson here. 

So HERE IT GOES!

 -- all you need is some Post-It notes, a writing utensil, and a cleared table top or wall space --

Complete the following sentence as many times as you can within a 10 minute time limit, putting each answer on its own Post-It note. When you're done with the note, simply place it to the side until you've completed your 10 minutes. Notice the word "ideal", this is not necessarily where you are now but where you want to be, so think BIG!

"In an ideal world, I strongly believe my artistic endeavors will ____________________."

When you are finished, arrange the notes in front of you, grouping similar answers together. I had 3 different clusters in all. Start to reread your notes and underline words that you use more than once. Then, create a title for each of your groups, giving them their own Post-It.

Now you are ready to take a stab at writing the first draft of your vision. Your vision explains in one broad sweeping sentence your dreams of what you want in your career. It's like the thesis statement to the essay that is your dream job. So, look at those underlined words, see the groupings you have made, and start formulating. You in no way are committed to your first draft, this is just a starting place.

Once you feel like you got a handle on that, you're ready to attack the mission statement. The mission statement is like the rest of your introductory paragraph in your dream job essay. Here is where you define the what, how, and who. What do you do, how do you do it, and who is it for? This summarizes your core values and how you pragmatically fulfill your vision. 

So, same idea as before with the Post-Its, new sentence. Start with the first blank and write as many notes as you can before moving onto the next blank.

In an ideal world, as an artist I      (what you do)     
by        (how you do it)      
for      (who)        .

I found this sentence to be more challenging. Try to think practically. State the obvious. Once again, take note of the word "ideal", do not put down "part-time waitress" because that's what you do now. Put down that dream job. Another way to think about it, if this sentence structure fuddles you, is:

I am        (what you are/want to be)      
that       (does what and how?)       
for      (who)       .

Now assess the new notes in front of you, arranging again into groups and acknowledging repeated words and phrases. Begin formulating your sentence or sentences; your mission statement can be as short or long as you want, as long as you get all the pertinent information in there. A lot of businesses have vision and mission statements written for their company. Think of yourself as a company of one. Amazon.com's vision and mission statement is summarized in one sentence: 

“Our vision is to be earth's most customer centric company; to build a place where people can come to find and discover anything they might want to buy online.” 

Obviously Amazon.com can't sell anything anyone wants to buy - that's their ideal speaking. But it works; it's clear, to-the-point, and leaves room for eternal growth. And they managed it all in one simple sentence! 

Maybe your vision and mission statement can get directed down to one sentence or it can be more, all that matters is that it makes sense to you, and gives you a touchstone of reference as you steer the course of your career. When done correctly, this is your north star for every decision you will make. Too many times, as artists (and others), we sacrifice our dreams for the prospect of easy money or to help other people with their dreams. Frankly, I'm tired of how often I say 'yes' to projects that I find no creative energy in. I'm ready to put my vision and mission statement into the forefront and stop forgetting about it when it comes to making decisions!!

I hope that you will find a chance to try this activity out in your own time, as many times as you need to clarify your goals. I highly recommend doing it with a friend and sharing your Post-Its along the way. I was amazed how different Megan would answer questions than me, and it got me inspired to think in new ways. Rereading sentences out loud helped put things into perspective. But, if you really don't want to share your vision with anyone else, you don't have to. This should be for you to come to a better understand of your dreams

But everything is better with a support system :)


Friday, February 21, 2014

BUILDING A HOME STUDIO {Part II}

Now for inside photos of my new studio!

Here's something silly about me: we're starting this project, the new doors have gone in and I'm walking through the space, trying to figure out future orientation of the room. As I take in my surroundings, I start to groan over my decision to cover up all the old that exists here; the beautifully-uneven floorboards, the humble tin roof, the smell and character of all this wood (which I'm sure came directly off the property we sit on). This is history here, as simple as it may be, and I hated to hide it. 

After moping to Adam about it, I realized that it needed to be covered to make the space practical; clean, bug-proof, and (mostly) level and even. He was right, and I fortunately got over it once I started to see the results. And I still had the outside of the barn to satiate me.

BAM! Whatta change! (Ok, really don't miss the old interior now)

Remember how I was telling you that reusing old materials can be hard? Yep, these doors taught me that lesson. They wouldn't square up with each other or the door frame and, oddly enough, one of the biggest puzzles we had was how to create a door closure. Being that these were originally interior doors, they were too thin and narrow to fit a standard door knob. The solution became simple pulls and separate locks for the inside and out. Maybe not ideal but it's now keeping the draft out. Can you see where the original knob was on this door? I swear Ma and Pa Troxler were shorties! (We've since gotten over the sensation of feeling like giants in our home)


Another challenge was to figure out what to do with the floor. I would've loved to save these oak floorboards but they weren't tongue-and-groove and being able to see the ground through some of the cracks was not a good thing. It was a challenge because flooring can become a very expensive project and I hadn't failed to remember that I did not own this building and was only renting. We eventually decided to cover the existing floor with OSB and cover it with the cheapest indoor/outdoor carpet I could find. 

Cons: harder to clean, fibers/threads stick to it, seems to be pilling with traction over time. 
Pros: CHEAP AND QUICK. 

Decision made, executed, and moving on.


Check out that table!! Adam built this for me. In my ideal studio, I would have a bolt-width table (50"-60") that I could walk completely around..........not gonna work for this space. Once the machines came in, the dimensions got smaller in the room and for my table. I covered and mounted foam-core board with batting to the wall. Thus, it can function as a design wall (with fabric being able to stick to the batting) and a typical cork board. Also a highly-recommended source of organization for anyone working with fabric is a roll-away bin stored underneath the table (barely seen here on the left-hand side). This is where all errant fabrics go that are too small or unruly for more sophisticated folded storage.


My Yamata safety stitch machine (or serger) and hanging flat patterns for pants. This machine allows me to finish any edge and sew with stretchy fabric.

One of the last projects has been to make these wonderful, red velvet curtains that are working wonders at keeping the space warmer and (as Adam noted) creating the atmosphere of a brothel when viewed from outside at night. Just need to hang a red light to complete the look :)


My Brother industrial single stitch machine. Speed and automatic thread cutting puts this machine miles ahead of any home sewing machine (although I will pull my old one out for the occasional zig-zag stitch).

New purchases for the space were a full-sized ironing board and a gravity-fed steam iron (aka-the IV looking thing hanging in the top right corner). I had been toting around a table-top ironing board for years. It was one of those things where what makes it convenient also makes it obnoxious. The fact that I could move it and store it so easily was nice but that it needed a table and was perpetually getting moved around to various sub-par surfaces made it a pain to work with. We found this great, old board in an antique shop in Asheboro for an easy $28. The steam iron was an indulgent purchase but I was straight sick of the incontinence problem I had with my old domestic iron. Not to mention the taxing, repetitive process of twisting your wrist every time you need to set it down (this one always stays face-down on a silicone mat). And simply, when you get used to working with great, industrial tools at work, it gets harder and harder to go back to your average, made-for-home-use equipment. 

And we've all learned by now that great tools make all the difference!!

A before shot of the back wall. This photo answered a lot of questions after we started mounting the shelves and, through lots of trial and error, eventually found the studs. I mean come on! Just look at that crooked-ass stud there on the right!

I can smell the organizing potential! We didn't run the shelves all the way across simply because a standard length of plywood only goes this far. It just made it all-around easier and, being that it was one of the plethora of projects I was roping my boyfriend into doing, I wanted to keep him happy and sane. Turns out now that extra spot on the side is a great place to store bolts of fabric. I'm hoping to maybe span the gap with a rod to hang patterns from but haven't thought seriously enough about it to go get the materials.

TA-DA!!!

Totally creativity explosion!! I originally planned the center shelf as a working surface; an extension to my table where I could place materials and keep the table top clear....it works better as a place to pile stuff... And the turntable is not working as a viable source of music. You can't get any work done if you're stopping every 5 songs to flip a record. I'll eventually get everything set up right!


This is the second real studio space I've been fortunate enough to have, but I've been setting-up and breaking-down many a work space in my time. And, every time, I add something new to the "ideal studio set-up" dream list. Not all of my dreams were possible in this space but, with every move, I get closer and closer to functioning more effectively and efficiently. My last studio was much more suitable for making quilts but now this studio is better for dress-making. It's a give and take when you're limited on space. 


I've been freelancing full-time for over a year now and doing it part-time for much longer. The greatest gift you can give yourself when you do this kind of personal work is to create a separate space to house this part of your life, even if it is just a room in your home. Shutting that door to your to-do list and the mess in-progress projects can bring, is the closest thing anyone of us can get to work-life balance. I am much more tolerant of clutter in my work space than I am in my den.

~

On that note, Alain de Botton's views on work-life balance and career anxieties has been one of my favorite TED Talks this week. View it here.  (He also has recently written a books titled "Art as Therapy" that I'm inclined to read. I like this guy!)


Thursday, February 13, 2014

BUILDING A HOME STUDIO {Part I}

Absolutely, hands-down, without-a-doubt, HERE IT IS!! The GREATEST gift I've ever given myself is contained within these 4 walls; a fully-equipped art and sewing studio!!

Our house is about 100 years old and part of the property behind the main house was an active farm until Dean's parents got too old to maintain it (at least 40 years ago) and no one else took up the responsibilities in their absence. Traces of old animal pens now hold trash heaps (country folk used to think it was a good way to discard their rubbish, devaluing their land in the process) and different out-buildings dot the land in various states of run-down.

It's sometimes hard to see how neglected this land is, still, I love living in a place with so much history. 


This building was originally used as a place to cure meats, and, being one of the only barns still functioning as a shelter from the elements, was called the 'dry barn'. After a failed attempt to return to school for upholstery in the fall, I decided to reallocate those tuition funds towards fixing it up as a home studio. Moving out to Julian meant the studio I was using in Hillsborough was no longer convenient and I needed somewhere to work. I decided to hire a contractor (Adam's childhood friend and former Bronzed Chorus drummer) and he got right to work insulating and finishing out the inside.

I always think about high school psychology in times like these -- when I find myself facing a large decision-making task. I remember learning that bigger decision-making is one the last skills we develop as humans, usually in the mid-20s. I won't say that this project is necessarily a cornerstone decision in my life, but when you're dropping down what you consider a larger chunk of money, it can create insecurity. "Am I being smart about this?" "Is this what I really want/need right now?" Ultimately, I knew that to further my career, make more money, and realize my dreams, I needed a place to work.  And I just looked at it as paying all my rent up front.

Hey, just think about how much money I can save by not driving anywhere!

We took off the existing door and replaced it with these french doors that originally lived in the main house, and were currently being stored in the dry barn. This alleviated the problem of not having many windows and made the space more inviting. A pane was missing from the bottom corner so we used the opportunity to add a cat door. Also, the removal of the vent created an extra window above.

Damn, look at all those leaves! We didn't know what to do when fall came. I'm learning a lot about what it takes to live on and maintain a large plot of land.

When we ran electricity to the studio, we also ran it to the the 2-car garage nearby. This will serve as Adam's future wood-working shop, but we're waiting till spring to start that project. No more hauling the table saw over to the house to plug it in! In this picture, I had taken the first door off to start the arduous process of scraping all the old (oil) paint off and re-finishing it with exterior paint. Man, that was a bitch! Such a pain, in fact, that I never got around to the second door.... And, with the onslaught of winter weather we got, my motivation was long, long gone.


///////////////////////////////////////////////////////////////////////////////
Lessons I learned from this project:
\\\\\\\\\\\\\\\\\\\\\\\\\\\\\\\\\\\\\\\\\\\\\\\\\\\\\\\\\\\\\\\\\\\\\\\\\\\\\\\\\

-hiring someone else to do work for you is GREAT!...as along as you've got the money to do it.

-trying to refurbish or reuse old materials is WAY harder than building new. But it stays in line with my passion for recycling and love of all things old.

-I do NOT like using power tools -- watching me wield a drill is as awkward as a cow on roller skates.

-I do NOT like being in charge of a project I cannot do myself, relying on other people for every step was a hugh lesson in patience.

~

All in all, the project was a success and well worth the trouble. The freedom and ease it now gives me to work is a real blessing.

-
These photos are from when we first moved into our place back in June. It's hard to believe our yard was ever this green! Or that within 8 months, I would've completely renovated this shed into what it is now.

Stay tuned for BUILDING A HOME STUDIO - Part II, where I'll talk about and share pictures of the inside of the studio!