Thursday, August 1, 2013

 My entire life, literally since my consciousness kicked in, I have wanted to be an artist. I remember being in kindergarden, and the teacher gave me one of those worksheets where on top there's the prompt, "When I grow up I want to be ________." And then there's room underneath to draw yourself in your field of choice. No lie, I was there in full-color Crayola with my easel, paintbrush and beret. I have been that single-mindedly focused on my future.

What I learned much later was, that to be an artist it means you also have to be a framer, a photographer, a web designer, a whiz with Photoshop, a business man, and don't forget PR, because you do have to interact with the rest of the world if you hope to make any money from this career. And odds are, if you are a talented artist, you probably suck at half of these things! So how do you do it? All by yourself, with only your weird thoughts, your stupid drawings, and the innumerous odd bits of things you collect that others would consider trash?

Good question!! Can you please tell me??

Okay, so here's my attempt at documenting this rather large, rather complicated bit of crochet lace I completed last year....yeah, no good. So how do I give justice to this piece I spent hours and hours making? How can I properly present this on my website? That took about as much thought as the piece itself! Not to mention, how do I display this on a wall, in that potential art show it's gonna be in or, even better, that art collector's home who pays a lot of money for it??

Okay, so here it is the first time I put it up on a wall. What you can't tell is that there are about 3 million steel pins stuck into each scallop just to get it looking this half-ass. Did I mention this is over 7 1/2 feet wide?? Yeah, it's pretty heavy and has a tendency to pull itself down. So what now?

So after thoughts of casting it in resin, I did some testing with various fabric stiffeners. Nothing fancy, just spray bottle stuff that you can find at craft stores. This would allow me to at least use less steel pins when hanging and then give me the potential for photographing it. When I finally got the result I wanted, it had been about a week straight of me pumping 2 bottles worth of stiffener over the crochet, allowing it dry between coats and switching between coating the front and the back. It held the scallops exactly the way I wanted them and still maintained the essence of the fabric that it is.


Now the real secret to success with this project, and probably everything else in the world: friends. Especially if they're super-talented, loaded down with tools and available to help! I can't say I know much of Seth's history with photography, but I do know that he owns about a million seamless rolls of paper in every color and big fancy lights. I work at Skram with him and what I do know is that he takes pictures of the finished furniture, after he finishes building them. He said yes when I asked for help, and got me to where I am now...properly documented and hang-ready!

This is where I stopped after bringing it into Photoshop, removing the fishing line, and playing with the background color. 

SO much more work goes into this stuff than one would ever realize, certainly more than I ever realized. And if you're doing this stuff by yourself, it requires significant work outside of being creative. I am always grateful for the skills I do have and always thankful for the skills that friends are willing to share with me.

Thursday, July 4, 2013

Tuesday, May 21, 2013

Am falling in love with feathered wreaths. They're not as hard to draw out as they seem, once your brain gets wrapped around them. And there's plenty of guidance out there to help you get to such a point. It's a very traditional quilting pattern, but of course I've turned my back on hand-quilting long ago, and instead have cultivated a love for the long-arm machine. So I just had to try my hand at some free-motion wreaths this past week. Tricky? Yes. Do-able? Also, yes. There's a geometry here that makes you fear any missteps, but once you step back from your work, they become perfectly magical.


Photographs coming soon of the quilted results!

Tuesday, May 14, 2013

:)

German poster for Sightseers

I've heard there's lots of good knitting in this movie, intriguing me...

Tuesday, April 30, 2013

Saturday, April 27, 2013

Keep It Together!

The third in my running knitted text series. It took us a while to get this frame together, first it was contemplating the dye, then sheen, then it was too cold for the lacquer to set, blah blah blah. Now it's done and I'm satisfied.

This idea came about after a meltdown on the phone with a friend and she politely informed me that I needed to "K.I.T." And I said "gurl thanks I needed that!" Haha, it's a good thing to be reminded of from time to time. Gotta love great friends who can keep things in perspective.


Monday, April 22, 2013

Promo photo for The Bronzed Chorus, was so happy to give them a band portrait they actually liked! And honored they wanted to sit under my filet crochet.
I wasn't sure how this pic would come together until Hunter plopped his blankets on the couch, then >pop< that was the color the photo needed. I'm so in love with that funky biscuit quilt and his mom made the crochet squares afgan. Gravy the cat is a great addition that reflects who these guys are...serious musicians with gentle cat-loving hearts!

Friday, April 19, 2013

Nasher knocked it out of the park on this one!
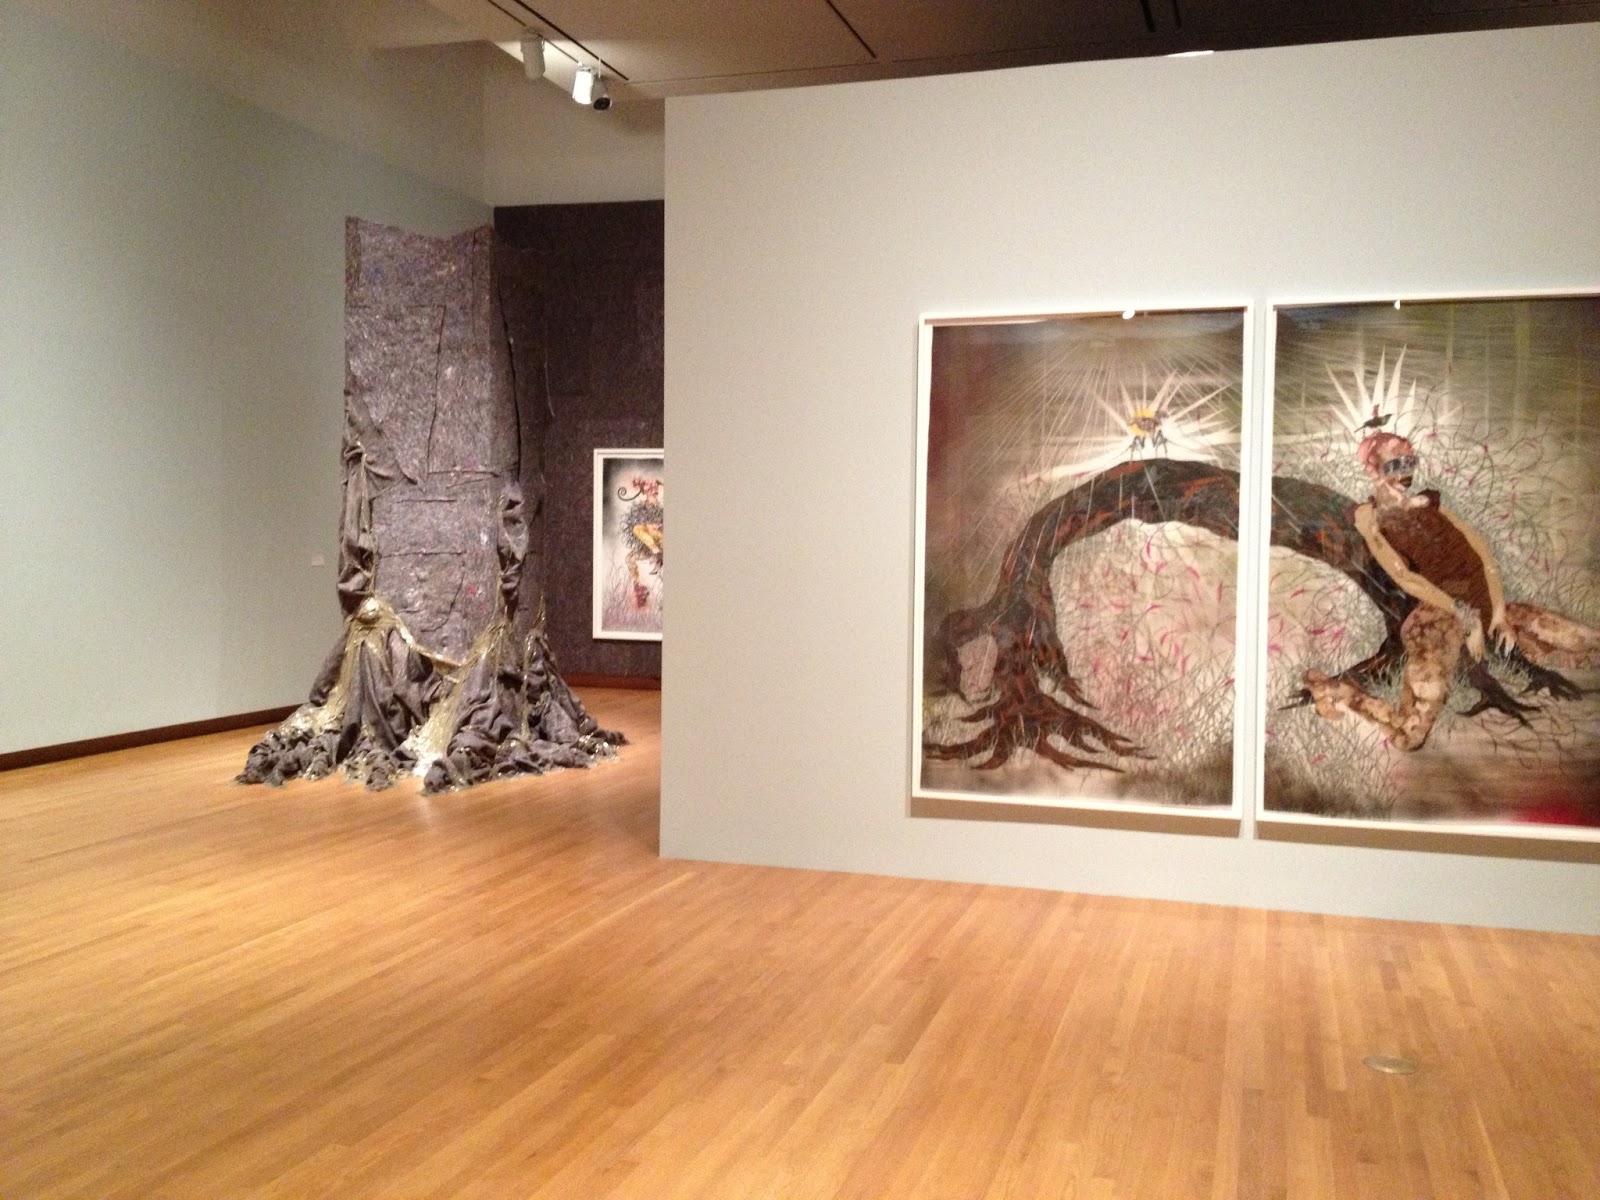
So glad I caught this exhibit, featuring 15 years of work by African-born, Brooklyn-based artist Wangechi Mutu.

A search for female identity through collage, paint, video art, and installation. When you first walk in, you become aware of the sounds in the room. Nature, singing, roars, and waves, coming from various videos playing throughout the space; it really created a unique atmosphere for looking at her work.

I became completely obsessed with the way she incorporated this felted, recycled, almost-industrial fiber with her art, using it to cover entire walls. In one way, an art show is simply hanging art on walls, in Mutu's way, she thought beyond the typical, creating atmosphere and texture by using this textile. I was so inspired and you KNOW I love a good textile. What can I say, it perfectly complimented her work.

We all agreed this video was amazing. I mean, c'mon, she projected from the ceiling onto wood pallets that were sitting on more fiber. A great way to take this piece to another level, finding a new way for the viewer to watch it. Her press-on 'talons' ripping into a 3-layer cake, a very literal address towards overconsumption; she was absolutely engaging and entertaining. When, as she eats the cake, hair starts to get stuck in her mouth, I found myself giggling out loud. She made me rethink my blasé approach to video art.

Beatiful, huge collage on Mylar paper gave a unique dimension to her work and an interesting texture to her paint.

Love that repeat pattern!

Mutu definitely allows in a certain amount of gore, but her femininity shines through in bright red glitter and high heels!

How gorgeous is this? Her recycled fiber grows down to the floor with the help of packaging tape. 

Being an artist myself, I need to remember that regularly attending exhibits like this is so important, not only to understand what other artists are doing around you, but also for the sheer inspiration and beauty of it all. Not to mention it makes me feel a whole lot better that she's been working on all this for 15 years. I guess my pace is not so slow after all!


Saturday, April 13, 2013

We had to say goodbye to our beloved family dog, Malone, this week. 
:(

I took this picture to document a repeat pattern I'm working on, that I'll then have printed on some fabric via Spoonflower. I was glad to find that I had taken one last picture of Malone before he left. He was so old, and so not himself anymore.....we had already mourned his death, for peat's sake, expecting it for so long. But it still hurts now that it's finally here. The end of a 15-year era.
You will be missed, Maloney Baloney!

Sunday, April 7, 2013

I just realized I never posted detail shots of the double wedding ring quilt I finished at the end of last year. What a journey it was, making this quilt, and what beautiful results I got! 

I started the quilting process in my studio, using the design wall as my oh-so-crucial assistant. First, I pin my backing fabric up to it for a few days to get all the creases and wrinkles out, sometimes using a spray bottle with water to help with the tough ones, and allowing gravity to take care of the rest. Then, while it's still pinned up there, I apply my first coat of basting spray, and attach the batting to it. The design wall is not strong enough to hold this much weight so I use plenty of pins. The next layer of basting spray is applied and then the quilt top is attached. I learned how to use basting spray on the floor, which is fine, but I greatly prefer the wall method. You find that gravity makes smoothing out the layers a breeze and you don't have to worry about any of your fabrics getting dirty.

Once my layers were stuck together, I moved to the machine. This was my solution to keep the quilt off the floor; three tables pushed together. The folding table was a nice touch because it was just short enough to slide under the other tables when I didn't need it. I started with simple outline stitches around the white melons and finished everything else on the long-arm machine.

APQS Millenium! Rental, of course. Trust me, if I had $17,000 to spare, I'd own one!

(I like seeing Manuel there on my shirt, looking over my sewing like a guiding angel)

I designed the quilting by playing with motifs on tracing paper and laying them out on the quilt top. Then, when I got to the machine, I made myself basic guidelines with chalk and sewed from there. This allowed me to be free with my movement but still have help as to placement and general shapes.

 The only thing I wasn't happy with, with this process, was that the sewing needle would push the chalk deep into the layers and didn't just wash away, as I had expected it to. I ended up scrubbing with a toothbrush and water to try and get it all out and, in some places, was unsuccessful. I don't know if other chalks would work better or if I needed a different process entirely, to avoid this problem.

But, I'm still happy with it! I love getting a chance to try new ideas and techniques, and it's the best when you can make smarter and smarter choices over time. I still haven't learned to prewash my fabrics though....

 Since I got to calling this quilt the "Palau quilt", I turned to native Palau plants as inspiration for the quilting motifs. The fronds became my favorite to sew.


 The easiest and most fun way for me to label quilts!